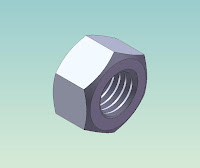
To learn step by step how to draw a Nut M12x1.75 easily. These steps use Extrude, Cut Extrude, Chamfer & Cut Sweep with Helix ordered
LEARN TO DRAW A NUT
Create the Extrusion
- Click Extruded Boss/Base
 on the Features toolbar.
The Front, Top, and Right planes appear, and the pointer changes to
on the Features toolbar.
The Front, Top, and Right planes appear, and the pointer changes to  .
.
- Select the Front plane.
- In Toolbar Menu, select Tool, Sketch Entities, Polygon
- Move the pointer to the sketch origin. Click the origin
 , then move the pointer vertically to create a polygon.
In the Property Manager, under Parameters:
· Set Number of Sides to 6.
· Click Inscribed circle.
· Set Circle Diameter to 18.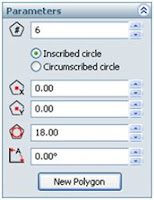 Click OK
  .
Click Circle
.
Click Circle  on the Sketch toolbar.
Click the origin
on the Sketch toolbar.
Click the origin , then move the pointer to create a circle.
In the Property Manager, under Parameters:
· Set Radius to 5.05.
, then move the pointer to create a circle.
In the Property Manager, under Parameters:
· Set Radius to 5.05.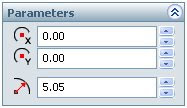
 Click Exit Sketch
  on the Sketch toolbar.
In the Property Manager, under Direction 1:
· Select Mid Plane in End Condition.
· Set Depth to 10.8.
on the Sketch toolbar.
In the Property Manager, under Direction 1:
· Select Mid Plane in End Condition.
· Set Depth to 10.8.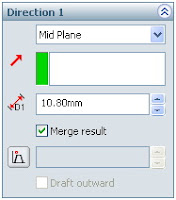

12. Click
OK to create the extrusion.
For more complete instruction, please open or download pdf file beside!


 .
.
 on the Sketch toolbar.
 , then move the pointer to create a circle.


 on the Sketch toolbar.


7 comments:
Why not just give the complete tutorial?
This does not show how to complete the thread.
For complete tutorial, please download my pdf format file "How to Draw a Nut".
I just made a tutorial "how to draw a nut" with a few improvements. Please follow
Hi i am new to autocad and i am trying to create your nut using autocad 2012 but finding it difficult, will it work on autocad 2012 ? also where is the icon to download the PDF file ? Any feedback would be greatly received.
No pdf.
Where's the PDF????
@lisvard: try this link
http://www.ziddu.com/downloadlink/2502259/To_Draw_a_Nut.pdf
Thanks !! that helps :)
Post a Comment