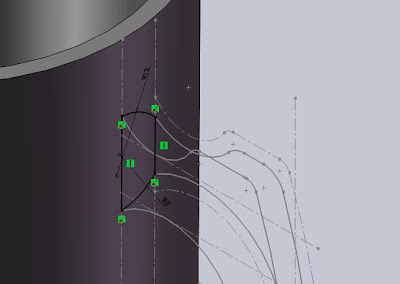
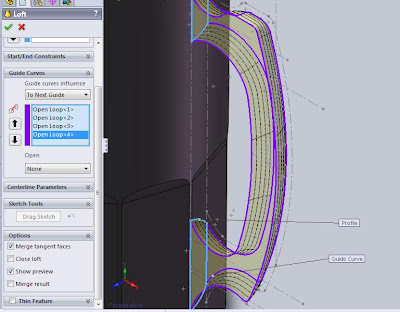
 The next step is to create a sketch profile handles. There are two profile that we will create, which is at the top and at the bottom. And we need a new plane to place the sketch profile. In this model I made a new plane that I put on the outer side of the glass. The command to create a new plane that is on the menu select Insert>Reference Geometry>Plane, then a dialog box appears on the Feature Manager. At First Reference Plane Right click and click on Reference Second Face (outer side of the glass) and then click OK. So now you'll have a new plane parallel to the plane and its location right on the outer side of the glass.
 Next you simply make a profile of the top and bottom of the handle glass On this plane, activate the new Plane and make sketches a profile like the picture below.
 Detail of upper part is you simply make a sketch of him to follow the points indicated on the sketch profile that we created earlier.
Top Profile

Bottom Profile  After the Exit Sketch, and select Insert>Boss/Base>Loft or click Lofted Boss/Base on the Features toolbar to create a handle glass. In the dialog box select the profile under the Profile section top and bottom. But before you point the cursor into the graphics area first and then right click and select SelectionManager. It comes five choices of selection and choose Select Closed Loop, and then point the cursor at the top of the profile, click on the left and end with a click on the OK icon icon Select Closed Loop.
 After the Exit Sketch, and select Insert>Boss/Base>Loft or click Lofted Boss/Base on the Features toolbar to create a handle glass. In the dialog box select the profile under the Profile section top and bottom. But before you point the cursor into the graphics area first and then right click and select SelectionManager. It comes five choices of selection and choose Select Closed Loop, and then point the cursor at the top of the profile, click on the left and end with a click on the OK icon icon Select Closed Loop.
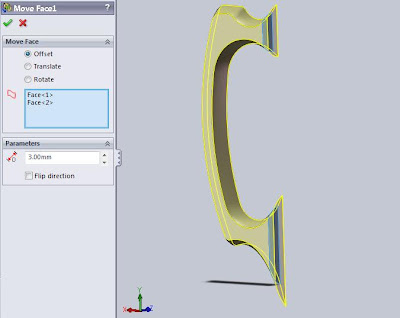
Now you have managed to make the handle fit the profile and guidenya glass. Because the grip is still half then you need to make a grip again. Use the mirror command to create a copy. Given the body of the handle has not been fully integrated with the body of the glass, then use the Move command to add a long face grip the surface of the glass. To facilitate the Move Face command, hide solid glass bodies first. How, in the Feature Manager there are two Solid Bodies, select the one body that was above and then right click and click hide the dialog box that appears.
 So now you are going to be easy to work on the Move Face command. On the menu select Insert> Face>Move or click the Move Face on Mold Tolls toolbar, then in the dialog box under the Move Face Offset check and selection both surfaces which will be offset. Under the parameters of the contents of the distance to 3mm. Click OK.
Next copy the picture above with mirror by selecting the menu command Insert>Pattern/Mirror>Mirror or click Mirror on the Features toolbar. Under the dialog box Mirror Face/Plane, select Face grip that piece with the Front Plane, click the body below the Bodies to Mirror dialog box, then check under the Solid Merge Option. Click OK.
 Next show the body back glass. How, in the Feature Manager there are two Solid Bodies, select the one body that was above and then right click and click show on the dialog box that appears. Then combine them with the Combine command. On the menu select Insert>Feature>Combine or click Combine on the toolbar feature. Under the Operation Type check Add then the selection of two body combined. Click OK.
  Finally, use the Fillet command to beautify the look of the picture above. Select Insert>Features>Fillet/Round or click Fillet on Feature toolbar. Under the Items to Fillet, specify the radius 5mm. Then the selection of the sides that are fillets. Click OK.
  With the same command, do to handle the top.
  Then also for lip glass fillet with a radius of 1mm. You can select the surface or the sides of the glass.
  It's finished you create a model of a glass below the handle. For the rendering process for the glass display like the picture that I showed in my tutorial first part will make the next article. Good luck!


