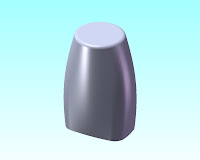
 This model use 3D Sketch and Lofted Boss. You will learn how to draw by 3D sketch, convert line to construction line, lofted boss using profiles and guide lines, and others tips.
 (Dimensions/Relations toolbar), and fully defined the sketch.
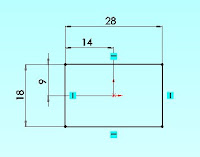 4. Click Offset Entities
  on the Sketch toolbar.
5. In the Property Manager, under Parameters:
on the Sketch toolbar.
5. In the Property Manager, under Parameters:- Select Add dimensions, Reverse, and Select chain
 6. Select all entities in the graphics area by left click and drag a rectangular as shown below.
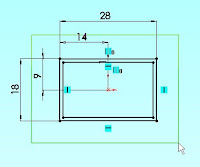 7. In the Property Manager, under Option:
- Select For construction.
 9. Click 3 Point Arc
  on the Sketch toolbar.
10. On the one of inside entities, select start and end points, then drag the arc on the mid one of outside entities to set the radius.
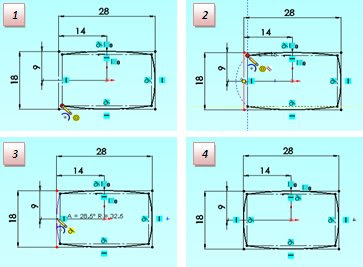 11. Click OK
  12. Click Fillet
  on the Sketch toolbar.
13. In the Property Manager, under Fillet Parameters:
In the graphics area select the two arcs.
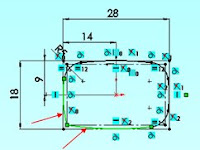 14. Click OK
  , then Click Exit Sketch
  II. Creating 3D Sketch to Define Top and Side of Bottle
1. Click Isometric on
  the Standard Views toolbar.
2. In the Feature Manager design tree, select the Top plane.
3. Click Plane
  on the Sketch toolbar.
4. In the Property Manager, under First Reference:
5. Click OK
  .
6. Click Circle
  on the Sketch toolbar.
7. Sketch a circle on Plane 2, with the center approximately along the same vertical axis as the sketch origin.
8. Click Add Relation  on the Dimensions/Relations toolbar.
9. In the graphics area select the arc and the origin
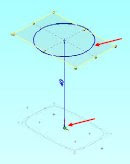 10. In the PropertyManager, under Add Relations click Concentric
  , then click OK
  .
.
11. Click Smart Dimension on the Dimensions/Relations toolbar, and dimension the arc diameter to 21.
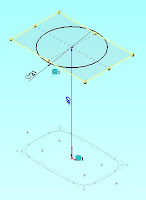 III. Creating the First Splines
1. Click Plane
  on the Sketch toolbar.
2. In the FeatureManager design tree, select Front for First Reference.
3. In the PropertyManager, under First Reference:
4. Click Spline
  on the Sketch toolbar.
5. Sketch a two point spline coincident with the ends points of the tangent arc.
6. Repeat step 5 with the points shown.
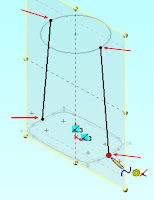 7. Click Normal To
  on the Standard Views Toolbar.
8. Select one of the two entities on the graphic area.
9. Click the dot on head arrow and drag until became a curve.
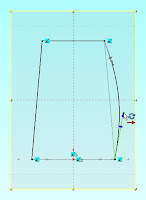 10. In the Property Manager, under Parameters:
11. Repeat step 8-9 with the other entity.
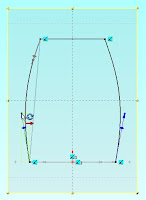 12. In the Property Manager, under Parameters:
13. Click OK
  .
IV. Creating the Second Splines
1. Click Isometric
  on the Standard Views toolbar.
2. Click Plane
  on the Sketch toolbar.
3. In the FeatureManager design tree, select Right for First Reference.
4. In the PropertyManager, under First Reference:
5. Click Spline
  on the Sketch toolbar.
6. Sketch a two point spline coincident with the ends points of the tangent arc.
7. Repeat step 6 with the points shown.
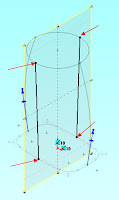 8. Click Normal To
  on the Standard Views Toolbar.
9. Select one of the two entities on the graphic area.
10. Click the dot on head arrow and drag until became a curve.
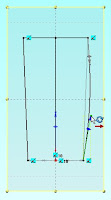 11. In the Property Manager, under Parameters:
12. Repeat step 9 - 10 with the other entity.
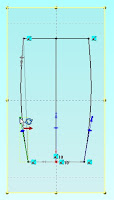 13. In the Property Manager, under Parameters:
14. Click OK
  , then Click Exit Sketch
  .
V. Creating Bottle by Lofted Boss
1. Click Isometric
  on the Standard Views toolbar.
2. Click Lofted Boss
  on the Feature Toolbar.
3. Right-click in the graphics area and choose SelectionManager.
4. In the SelectionManager, click Select Closed Loop
  .
5. Select the Sketch1 for Profiles
  and click
  .
.
 6. Select and accept the circular sketch for Profiles
  .
.
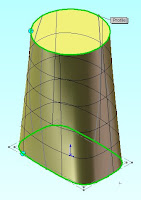 7. In the PropertyManager, click in Guide Curves.
8. In the graphics area, right-click and choose SelectionManager. Use the Select Open Loop
  tool to select the four splines for Guide Curves
  .
.
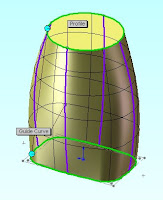 9. Click OK
  .
10. Click Fillet
  on the Feature Toolbar.
11. In the Property Manager, under Item To Fillet:
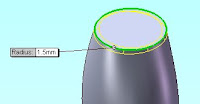 12. Click OK
  .
.
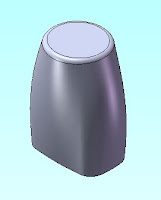 Congratulations! You have completed this lesson.
For more detail, please see on video tutorial below:
* For better playback, allow the video to download before playing
 Download WMV ( 5.1 MB compressed file )


No comments:
Post a Comment